
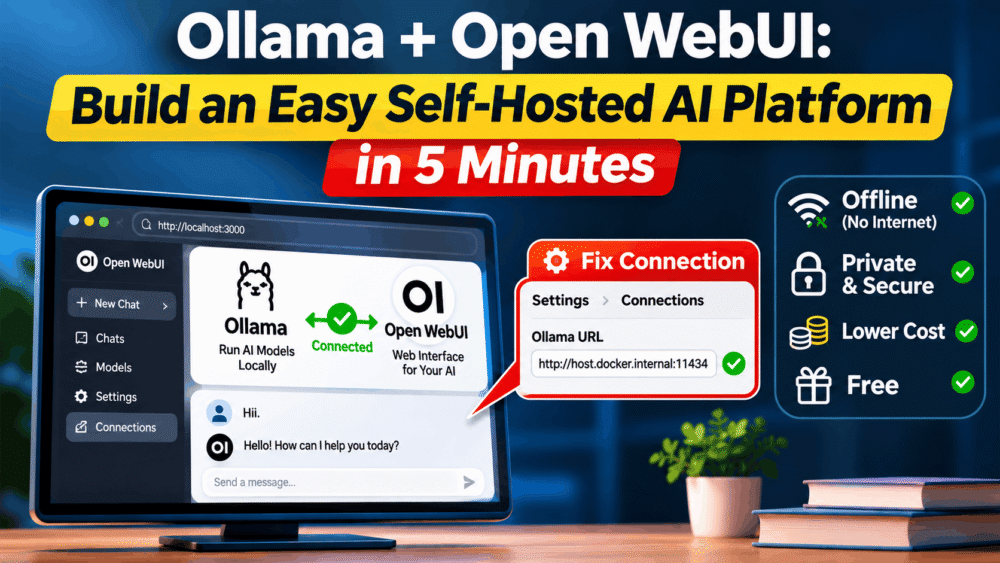
Want to run AI models on your own computer without relying on cloud services or an internet connection? With Ollama and Open WebUI, you can build a powerful self-hosted AI platform that lets you chat with AI models locally, keep your data private, and work offline. Best of all, both tools are free to use, making it possible to create your own AI chatbot without expensive subscriptions or recurring fees. In this guide, I’ll show you how to install Ollama, connect it to Open WebUI, and run your own AI platform in just a few minutes.
Table of Contents
1. Introduction
Running AI models doesn’t always require expensive cloud subscriptions or sending your data to online services. Ollama makes it possible to download and run AI models directly on your computer. Open WebUI provides a simple, user-friendly interface to interact with those models through your web browser. By combining these two tools, you can build your own free self-hosted AI platform and chat with AI models locally.
The best part is that once you download the required AI models, you can use this setup offline without an active internet connection. It also gives you greater control over your data and helps reduce recurring AI subscription costs. In this guide, I’ll walk you through installing Ollama and Open WebUI on Linux, connecting them, testing the setup, and uninstalling both tools when you no longer need them. I’ll also share my experience running AI models on a low-spec PC.
2. Installation: Build Your Self-Hosted AI Platform
Let’s build our own self-hosted AI platform using Ollama and Open WebUI. I’ll demonstrate the installation process on Linux, starting with Ollama to download and run AI models locally, followed by Open WebUI to access those models through a web-based interface.
2.1 Install Ollama
First, visit the official Ollama installation guide for Linux.
Open your terminal and run the following command to install Ollama:
curl -fsSL https://ollama.com/install.sh | shIf you are upgrading from an earlier version, remove the old libraries first:
sudo rm -rf /usr/lib/ollamaNote: During installation, the installer may attempt to install NVIDIA drivers. I chose not to install them because they could interfere with my video-editing software. I pressed Ctrl+C to cancel that part of the process, as Ollama had already been installed.
To verify the installation, run:
ollama -vNext, start the Ollama service:
ollama serveNow, download an AI model. I’m using qwen3:1.7b because I have a low-spec PC with limited hardware resources.
ollama pull qwen3:1.7bOnce the download is complete, check the available models and run your selected model:
ollama ls
ollama run qwen3:1.7b
To exit the running model, enter:
/byeIf you want to stop a running model and save system resources, first list the running models and then stop the one you want:
ollama ls
ollama stop <ID>
That’s it! Ollama is installed, and your selected AI model is ready to use.
2.2 Install Open WebUI
Next, let’s install Open WebUI, which provides a browser-based interface for interacting with locally running AI models.
I initially planned to install Open WebUI directly on my computer to reduce resource usage. However, after observing its resource consumption, I decided to use Docker Compose instead.
Follow the official Open WebUI Quick Start Guide for reference.
Step 1: Create the Docker Compose file
Create a file named docker-compose.yml and add the following configuration:
services:
  open-webui:
    image: ghcr.io/open-webui/open-webui:main
    ports:
      - "3000:8080"
    volumes:
      - open-webui:/app/backend/data
    extra_hosts:
      - host.docker.internal:host-gateway
    environment:
      - WEBUI_SECRET_KEY=your-secret-key
    restart: unless-stopped

volumes:
  open-webui:
Replace your-secret-key with a randomly generated secret key. You can generate one using:
openssl rand -hex 32Step 2: Start Open WebUI
Open a terminal in the directory containing your Docker Compose file and execute:
docker compose up -dDocker will download the required image and create the container. Wait approximately 3–5 minutes for the web service to become ready.
Step 3: Access Open WebUI
Open your web browser and visit:
http://localhost:3000Click Get started, enter your name and email address, set a password, and click Create account. Once registration is complete, you’ll be redirected to the Open WebUI dashboard.
Step 4: Connect Ollama to Open WebUI
If your downloaded AI model doesn’t appear in the chat model list, you may need to configure the connection between Ollama and Open WebUI.
- Open Settings from the bottom-left sidebar and select Connections. Check whether the Ollama URL is already set to
http://host.docker.internal:11434. - Check the Docker bridge gateway IP using:
sudodocker network inspect bridge - Open the Ollama systemd service file:
sudo nano /etc/systemd/system/ollama.service
Under the[Service]section, add the following environment variable, replacing the IP address with your Docker bridge gateway IP if it differs:[Service]Environment="OLLAMA_HOST=172.17.0.1" - Reload the systemd configuration and restart Ollama:
sudo systemctl daemon-reloadsudo systemctl restart ollama - Return to
http://localhost:3000and refresh the page. Your downloaded AI model should now be available.
Step 5: Test Your Self-Hosted AI Platform
Let’s test whether everything is working correctly.
Open a new chat, select your downloaded AI model, and send a simple message such as “Hi.”
On my low-spec PC, the AI platform took approximately four minutes to respond, but it worked successfully.
I also tested the file analysis feature by attaching a file and asking the AI to analyze it. This took more than five minutes, but the feature worked.
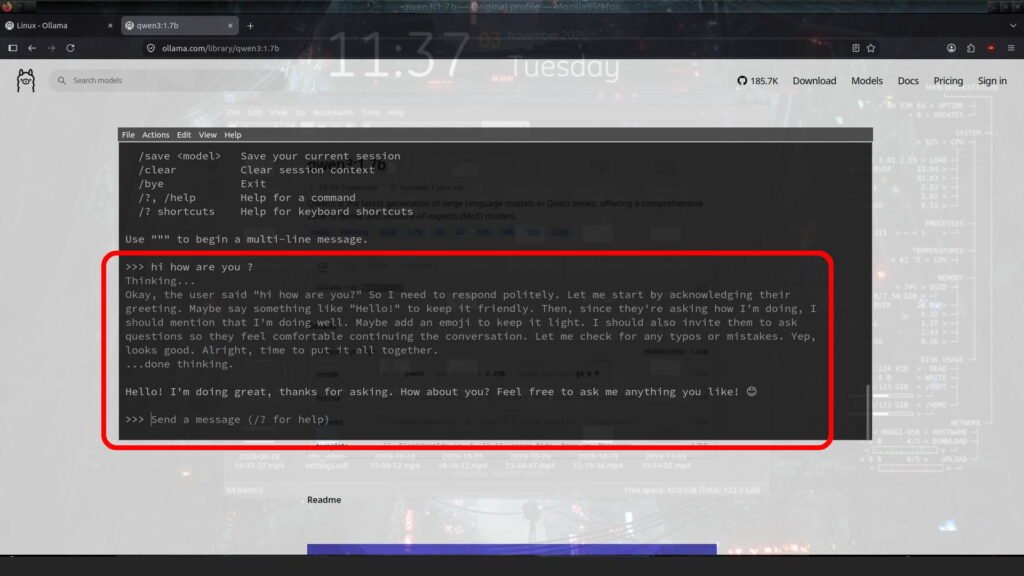
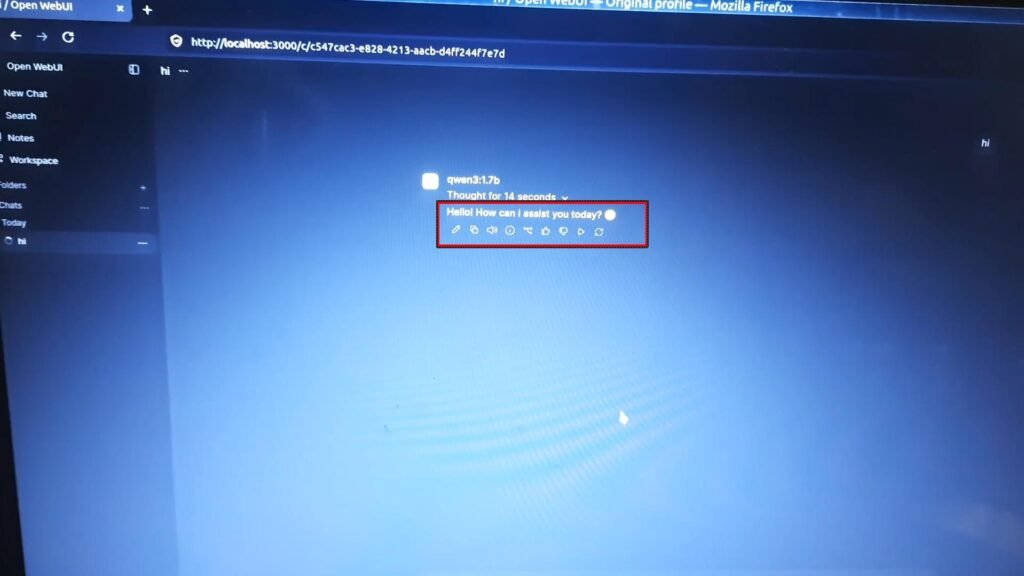
I noticed an interesting difference: Ollama CLI generated a dictionary-style explanation for a simple “Hi” message, while Open WebUI responded more naturally with “Hello! How can I assist today?”
Your response time will depend on your computer’s hardware and the AI model you choose.
Congratulations! You’ve successfully installed Ollama and Open WebUI and built your own self-hosted AI platform.
3. Uninstallation: Remove Your Self-Hosted AI Platform
If you no longer need your local AI platform, you can uninstall Open WebUI and Ollama from your Linux computer. Follow the steps below, starting with Open WebUI and then removing Ollama.
3.1 Uninstall Open WebUI
First, navigate to the directory where you saved your docker-compose.yml file.
Stop and remove the Open WebUI container using:
sudo docker compose downIf you also want to delete Open WebUI’s stored data, remove its Docker volume. First, list the available volumes:
sudo docker volume lsIdentify the Open WebUI volume and remove it:
sudo docker volume rm <volume-id>Note: Removing the Docker volume permanently deletes your Open WebUI data, including stored settings and conversations. Make sure you have a backup if needed.
I chose to keep the downloaded Docker image because it occupies approximately 6.44 GB, and I didn’t want to download it again if I decided to reinstall Open WebUI.
3.2 Uninstall Ollama
After removing Open WebUI, you can uninstall Ollama.
Step 1: Stop and disable the Ollama service
Run the following commands:
sudo systemctl stop ollama
sudo systemctl disable ollama
Step 2: Remove the Ollama service file
sudo rm /etc/systemd/system/ollama.serviceStep 3: Remove Ollama libraries
Depending on your installation, Ollama libraries may be located in directories such as /usr/local/lib, /usr/lib, or /lib.
sudo rm -r $(which ollama | tr 'bin' 'lib')Check the installation directory before removing the related files.
Step 4: Remove the Ollama binary
Ollama binaries may be located in /usr/local/bin, /usr/bin, or /bin. Verify the actual location before removing the binary.
sudo rm $(which ollama)Step 5: Remove downloaded models and service accounts
If you want to completely remove Ollama and its downloaded models, execute:
sudo userdel ollama
sudo groupdel ollama
sudo rm -r /usr/share/ollama
Important: I have intentionally left out an automatic library-removal command because its path transformation could select the wrong directory. Always verify file paths before deleting anything.
For additional details, refer to the official Ollama uninstall instructions.
4. Full Video Tutorial
5. Final Thoughts
Combining Ollama and Open WebUI is an excellent way to build your own free, self-hosted AI platform without depending on expensive cloud-based AI subscriptions. Once you download the required models, you can run AI locally, work offline, and keep greater control over your data. If you’re interested in exploring AI agents as well, check out my guide on installing Hermes Agent with OpenRouter on Linux. This setup can be particularly useful for individuals, developers, and small businesses that want to experiment with AI without paying recurring subscription fees.
However, your experience will depend heavily on your computer’s hardware resources. I tested this setup on my low-spec PC using the qwen3:1.7b model. Although the installation was successful, the AI took approximately four minutes to respond to a simple message. File analysis took more than five minutes. This shows that even smaller AI models can work on limited hardware, but response times may not be ideal.
Recommended Hardware for Small Businesses (5–10 Employees)
If you plan to use Ollama and Open WebUI in a small business with 5–10 employees, I recommend running them on a dedicated computer or local server rather than installing everything separately on individual computers.
Here are my recommended hardware configurations:
1. Basic Setup – Budget-Friendly
Suitable for experimenting with AI, basic content generation, and occasional use by a small team.
- Processor: AMD Ryzen 7 or Intel Core i7.
- RAM: 32 GB.
- GPU: NVIDIA GPU with 12–16 GB VRAM.
- Storage: 1 TB NVMe SSD.
- Network: Gigabit Ethernet.
2. Recommended Setup – Small Business
Suitable for regular AI usage, document analysis, content creation, coding assistance, and multiple employees accessing the platform.
- Processor: AMD Ryzen 9 or Intel Core i9.
- RAM: 64 GB.
- GPU: NVIDIA GPU with 24–32 GB VRAM.
- Storage: 2 TB NVMe SSD.
- Network: Gigabit Ethernet.
- Power supply: Suitable high-quality PSU based on GPU requirements.
3. Advanced Setup – Heavy AI Workloads
Suitable for businesses that expect frequent simultaneous requests, larger AI models, and more demanding document analysis.
- Processor: High-performance AMD Ryzen 9 or AMD Threadripper.
- RAM: 128 GB or more.
- GPU: Professional NVIDIA GPU with 48 GB or more VRAM, or multiple supported GPUs.
- Storage: 2–4 TB NVMe SSD.
- Network: 2.5 Gigabit Ethernet or faster.
My recommendation: For a small business with 5–10 employees, I would choose the recommended setup with 64 GB RAM and a GPU with at least 24 GB VRAM. Employees can access the Open WebUI interface through their browsers while Ollama runs AI models on the central server.
Keep in mind that hardware requirements increase with model size, context length, and the number of simultaneous requests. Ollama can queue requests when available memory is insufficient, so a single server may not provide instant responses to all 10 employees simultaneously.
Overall, Ollama + Open WebUI is a great free alternative for building a self-hosted AI platform. You can start with smaller models and existing hardware, evaluate the performance, and upgrade your resources as your business requirements grow.